


Questgeber auf der Karte: Unterschied zwischen den Versionen
Keine Bearbeitungszusammenfassung |
KKeine Bearbeitungszusammenfassung |
||
| (6 dazwischenliegende Versionen von 2 Benutzern werden nicht angezeigt) | |||
| Zeile 1: | Zeile 1: | ||
= Questgeber auf der Karte = | |||
[[File:Map_employer_hint.png|right|link=]]Neben den bekannten Questgebern im [[Saloon]] gibt es auch Plätze auf der [[Benutzeroberfläche#Karte_.281.29|Karte]], an denen Quests auf dich warten. Ein solcher Questgeber muss keine Person sein, sondern kann auch ein Ort sein, an dem du etwas machen musst. Questgeber auf der Minimap werden durch ein schwarzes Ausrufezeichen mit gelbem Hintergrund gekennzeichnet. Um nicht zu viele Anlaufpunkte auf der Karte suchen zu müssen, wurden die Questgeber auf einige, wenige Questpunkte zusammengelegt. | |||
Um eine Aufgabe von einem Questgeber anzunehmen, musst du dich bei ihm befinden. Es gibt Aufgaben, die erst sichtbar werden, wenn du dich am Standort des Questgebers befindest. | |||
Hier folgt nun eine Liste aller bekannten Questorte und den dort sich befindenden Questgebern. Bedenke aber, dass so mancher Questgeber erst auftaucht wenn bestimmte Voraussetzungen erfüllt sind. | |||
<div class="quest_emp"> | <div class="quest_emp"> | ||
{| id=1728-2081 | {| id=1728-2081 | ||
! colspan="6"| Geisterstadt | ! colspan="6"| | ||
== Geisterstadt == | |||
|- | |- | ||
| colspan="3"| [[File:quests_geisterstadt_01.png|link=]] || colspan="3"| {{MapCoords|1728-2081|Geisterstadt|380}} | | colspan="3"| [[File:quests_geisterstadt_01.png|link=]] || colspan="3"| {{MapCoords|1728-2081|Geisterstadt|380}} | ||
| Zeile 9: | Zeile 17: | ||
|} | |} | ||
{| id=112-12905 | {| id=112-12905 | ||
! colspan="6"| Westlicher Knotenpunkt | ! colspan="6"| | ||
== Westlicher Knotenpunkt == | |||
|- | |- | ||
| colspan="3"| [[File:quests_oestliches_wegkreuz.png|link=]] || colspan="3"| {{MapCoords|112-12905|Westlicher Knotenpunkt|380}} | | colspan="3"| [[File:quests_oestliches_wegkreuz.png|link=]] || colspan="3"| {{MapCoords|112-12905|Westlicher Knotenpunkt|380}} | ||
| Zeile 16: | Zeile 25: | ||
|} | |} | ||
{| id=3254-7027 | {| id=3254-7027 | ||
! colspan="6"| Streinkreislichtung | ! colspan="6"| | ||
== Streinkreislichtung == | |||
|- | |- | ||
| colspan="3"| [[File:quests_waldlichtung_01.png|link=]] || colspan="3"| {{MapCoords|3254-7027|Streinkreislichtung|380}} | | colspan="3"| [[File:quests_waldlichtung_01.png|link=]] || colspan="3"| {{MapCoords|3254-7027|Streinkreislichtung|380}} | ||
| Zeile 23: | Zeile 33: | ||
|} | |} | ||
{| id=4420-16269 | {| id=4420-16269 | ||
! colspan=" | ! colspan="10"| | ||
== Herrensitz == | |||
|- | |- | ||
| colspan=" | | colspan="5"| [[File:quests_herrenhaus_02.png|link=]] || colspan="5"| {{MapCoords|4420-16269|Herrensitz|380}} | ||
|- | |- | ||
| {{QuestEmp|risingsun|House of the Rising Sun}} || {{QuestEmp|mansion|Das Anwesen}} || {{QuestEmp|starr|Belle Starr}} || {{QuestEmp|safe|Herrensitz}} | | colspan="2"| {{QuestEmp|risingsun|House of the Rising Sun}} || colspan="2"| {{QuestEmp|mansion|Das Anwesen}} || colspan="2"| {{QuestEmp|starr|Belle Starr}} || colspan="2"| {{QuestEmp|safe|Herrensitz}} || colspan="2"| {{QuestEmp|runs_like_a_deer|Läuft wie ein Reh}} | ||
|} | |} | ||
{| id=4890-11138 | {| id=4890-11138 | ||
! colspan="6"| Newport | ! colspan="6"| | ||
== Newport == | |||
|- | |- | ||
| colspan="3"| [[File:quests_biggest_town.png|380px|link=]] || colspan="3"| {{MapCoords|4890-11138|Newport|380}} | | colspan="3"| [[File:quests_biggest_town.png|380px|link=]] || colspan="3"| {{MapCoords|4890-11138|Newport|380}} | ||
| Zeile 37: | Zeile 49: | ||
|} | |} | ||
{| id=8254-1154 | {| id=8254-1154 | ||
! colspan="6"| Einsame Farm | ! colspan="6"| | ||
== Einsame Farm == | |||
|- | |- | ||
| colspan="3"| [[File:quests_farm_01.png|link=]] || colspan="3"| {{MapCoords|8254-1154|Einsame Farm|380}} | | colspan="3"| [[File:quests_farm_01.png|link=]] || colspan="3"| {{MapCoords|8254-1154|Einsame Farm|380}} | ||
|- | |- | ||
| {{QuestEmp| | | {{QuestEmp|corn_01|Maisfeld}} || {{QuestEmp|chivington|Chivingtons Farm}} || {{QuestEmp|steve|Steve Chuck}} || {{QuestEmp|wilsons_farm|Wilsons Farm}} || {{QuestEmp|dean|Dean Anderson}} || {{QuestEmp|macguffin|Angus McGuffin}} | ||
|} | |} | ||
{| id=8353-14893 | {| id=8353-14893 | ||
! colspan="4"| Farm der Cunninghams | ! colspan="4"| | ||
== Farm der Cunninghams == | |||
|- | |- | ||
| colspan="2"| [[File:quests_farm_02.png|link=]] || colspan="2"| {{MapCoords|8353-14893|Farm der Cunninghams|380}} | | colspan="2"| [[File:quests_farm_02.png|link=]] || colspan="2"| {{MapCoords|8353-14893|Farm der Cunninghams|380}} | ||
| Zeile 51: | Zeile 65: | ||
|} | |} | ||
{| id=9984-9345 | {| id=9984-9345 | ||
! colspan="4"| Lagerplatz | ! colspan="4"| | ||
== Lagerplatz == | |||
|- | |- | ||
| colspan="2"| [[File:quests_feuerstelle_01.png|link=]] || colspan="2"| {{MapCoords|9984-9345|Lagerplatz|380}} | | colspan="2"| [[File:quests_feuerstelle_01.png|link=]] || colspan="2"| {{MapCoords|9984-9345|Lagerplatz|380}} | ||
| Zeile 58: | Zeile 73: | ||
|} | |} | ||
{| id=10146-14523 | {| id=10146-14523 | ||
! colspan=" | ! colspan="6"| | ||
== Saltwater == | |||
|- | |- | ||
| colspan=" | | colspan="3"| [[File:quests_saltwater.png|380px|link=]] || colspan="3"| {{MapCoords|10146-14523|Saltwater|380}} | ||
|- | |- | ||
| {{QuestEmp|mainstory_7_station|Saltwater Station}} || {{QuestEmp|mainstory_7_ranch|Saltwater Ranch}} || {{QuestEmp|mainstory_7_railroad|Mortimer Eisenbahn-Gesellschaft}} || {{QuestEmp|mainstory_7_showdown|Calvin}} | | {{QuestEmp|mainstory_7_station|Saltwater Station}} || {{QuestEmp|mainstory_7_ranch|Saltwater Ranch}} || {{QuestEmp|mainstory_7_railroad|Mortimer Eisenbahn-Gesellschaft}} || {{QuestEmp|mainstory_7_showdown|Calvin}} || {{QuestEmp|teacher|Lehrerin}} || {{QuestEmp|baker|Bäcker}} | ||
|} | |} | ||
{| id=11449-1805 | {| id=11449-1805 | ||
! colspan="6"| Crystal Town | ! colspan="6"| | ||
== Crystal Town == | |||
|- | |- | ||
| colspan="3"| [[File:quests_crystal.png|380px|link=]] || colspan="3"| {{MapCoords|11449-1805|Crystal Town|380}} | | colspan="3"| [[File:quests_crystal.png|380px|link=]] || colspan="3"| {{MapCoords|11449-1805|Crystal Town|380}} | ||
| Zeile 72: | Zeile 89: | ||
|} | |} | ||
{| id=12821-18967 | {| id=12821-18967 | ||
! colspan="10"| Wüstenstadt | ! colspan="10"| | ||
== Wüstenstadt == | |||
|- | |- | ||
| colspan="5"| [[File:quests_wuestenlager01.png|link=]] || colspan="5"| {{MapCoords|12821-18967|Wüstenstadt|380}} | | colspan="5"| [[File:quests_wuestenlager01.png|link=]] || colspan="5"| {{MapCoords|12821-18967|Wüstenstadt|380}} | ||
| Zeile 79: | Zeile 97: | ||
|} | |} | ||
{| id=14419-5741 | {| id=14419-5741 | ||
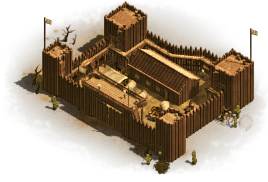
! colspan="6"| Fort Mencer | ! colspan="6"| | ||
== Fort Mencer == | |||
|- | |- | ||
| colspan="3"| [[File:quests_three_places.png|380px|link=]] || colspan="3"| {{MapCoords|14419-5741|Fort Mencer|380}} | | colspan="3"| [[File:quests_three_places.png|380px|link=]] || colspan="3"| {{MapCoords|14419-5741|Fort Mencer|380}} | ||
| Zeile 86: | Zeile 105: | ||
|} | |} | ||
{| id=15028-8814 | {| id=15028-8814 | ||
! colspan="10"| Dunkle Höhle | ! colspan="10"| | ||
== Dunkle Höhle == | |||
|- | |- | ||
| colspan="5"| [[File:quests_hoehle.png|link=]] || colspan="5"| {{MapCoords|15028-8814|Dunkle Höhle|380}} | | colspan="5"| [[File:quests_hoehle.png|link=]] || colspan="5"| {{MapCoords|15028-8814|Dunkle Höhle|380}} | ||
| Zeile 93: | Zeile 113: | ||
|} | |} | ||
{| id=16126-17398 | {| id=16126-17398 | ||
! colspan="4"| Werkstatt | ! colspan="4"| | ||
== Werkstatt == | |||
|- | |- | ||
| colspan="2"| [[File:quests_werkstatt.png|link=]] || colspan="2"| {{MapCoords|16126-17398|Werkstatt|380}} | | colspan="2"| [[File:quests_werkstatt.png|link=]] || colspan="2"| {{MapCoords|16126-17398|Werkstatt|380}} | ||
| Zeile 100: | Zeile 121: | ||
|} | |} | ||
{| id=18541-14375 | {| id=18541-14375 | ||
! colspan="10"| Big Bourbon | ! colspan="10"| | ||
== Big Bourbon == | |||
|- | |- | ||
| colspan="5"| [[File:quests_apple_town.png|link=]] || colspan="5"| {{MapCoords|18541-14375|Big Bourbon|380}} | | colspan="5"| [[File:quests_apple_town.png|link=]] || colspan="5"| {{MapCoords|18541-14375|Big Bourbon|380}} | ||
| Zeile 107: | Zeile 129: | ||
|} | |} | ||
{| id=18688-12831 | {| id=18688-12831 | ||
! colspan="4"| Jacksonville | ! colspan="4"| | ||
== Jacksonville == | |||
|- | |- | ||
| colspan="2"| [[File:quests_stadt_02.png|link=]] || colspan="2"| {{MapCoords|18688-12831|Jacksonville|380}} | | colspan="2"| [[File:quests_stadt_02.png|link=]] || colspan="2"| {{MapCoords|18688-12831|Jacksonville|380}} | ||
| Zeile 114: | Zeile 137: | ||
|} | |} | ||
{| id=19995-6400 | {| id=19995-6400 | ||
! colspan="4"| Zentraler Knotenpunkt | ! colspan="4"| | ||
== Zentraler Knotenpunkt == | |||
|- | |- | ||
| colspan="2"| [[File:quests_kreuzung.png|link=]] || colspan="2"| {{MapCoords|19995-6400|Zentraler Knotenpunkt|380}} | | colspan="2"| [[File:quests_kreuzung.png|link=]] || colspan="2"| {{MapCoords|19995-6400|Zentraler Knotenpunkt|380}} | ||
| Zeile 121: | Zeile 145: | ||
|} | |} | ||
{| id=21963-1371 | {| id=21963-1371 | ||
! colspan=" | ! colspan="6"| | ||
== Alte Eisenmine == | |||
|- | |- | ||
| colspan=" | | colspan="3"| [[File:quests_mine_01.png|link=]] || colspan="3"| {{MapCoords|21963-1371|Alte Eisenmine|380}} | ||
|- | |- | ||
| {{QuestEmp|mine1|Mine}} || {{QuestEmp|old_mine|Alte Mine}} || {{QuestEmp|mountain_ruins|Ruinen im Gebirge}} || {{QuestEmp|old_man_hackett_e1|Old Man Hackett}} || {{QuestEmp|emilio_vargas_e1|Emilio Vargas}} || {{QuestEmp|lorenzo|Lorenzo}} | |||
|} | |} | ||
{| id=22641-18665 | {| id=22641-18665 | ||
! colspan="6"| Sad Hill | ! colspan="6"| | ||
== Sad Hill == | |||
|- | |- | ||
| colspan="3"| [[File:quests_cementry.png|link=]] || colspan="3"| {{MapCoords|22641-18665|Sad Hill|380}} | | colspan="3"| [[File:quests_cementry.png|link=]] || colspan="3"| {{MapCoords|22641-18665|Sad Hill|380}} | ||
| Zeile 135: | Zeile 161: | ||
|} | |} | ||
{| id=23003-9823 | {| id=23003-9823 | ||
! colspan=" | ! colspan="6"| | ||
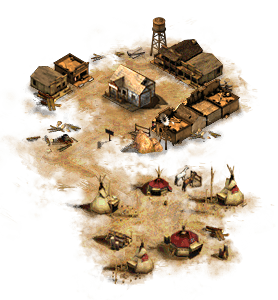
== Neue Siedlung == | |||
|- | |- | ||
| colspan=" | | colspan="3"| [[File:quests_desert_village.png|link=]] || colspan="3"| {{MapCoords|23003-9823|Neue Siedlung|380}} | ||
|- | |- | ||
| {{QuestEmp|hope|Die Siedlung Hope}} || {{QuestEmp|woods|Das Greenhorn-Lager im Wald}} || {{QuestEmp|indian_reservat|Neu besiedeltes Reservat}} || {{QuestEmp|train_station|Bahnstation der Siedlung Colby}} || {{QuestEmp|alan_pink|Alan Pinkerton}} || {{QuestEmp|travelling_thief|Dieb}} | |||
|} | |} | ||
{| id=23253-17125 | {| id=23253-17125 | ||
! colspan="6"| Wüstenlager | ! colspan="6"| | ||
== Wüstenlager == | |||
|- | |- | ||
| colspan="3"| [[File:quests_feuerstelle_02.png|link=]] || colspan="3"| {{MapCoords|23253-17125|Wüstenlager|380}} | | colspan="3"| [[File:quests_feuerstelle_02.png|link=]] || colspan="3"| {{MapCoords|23253-17125|Wüstenlager|380}} | ||
| Zeile 149: | Zeile 177: | ||
|} | |} | ||
{| id=24399-12536 | {| id=24399-12536 | ||
! colspan="4"| Shadyland | ! colspan="4"| | ||
== Shadyland == | |||
|- | |- | ||
| colspan="2"| [[File:quests_shadyland.png|380px|link=]] || colspan="2"| {{MapCoords|24399-12536|Shadyland|380}} | | colspan="2"| [[File:quests_shadyland.png|380px|link=]] || colspan="2"| {{MapCoords|24399-12536|Shadyland|380}} | ||
| Zeile 156: | Zeile 185: | ||
|} | |} | ||
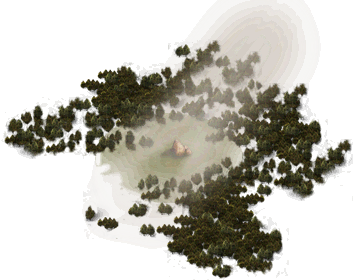
{| id=27948-4523 | {| id=27948-4523 | ||
! colspan=" | ! colspan="10"| | ||
== Geheimnissvolle Waldlichtung == | |||
|- | |- | ||
| colspan=" | | colspan="5"| [[File:quests_waldlichtung_02.png|link=]] || colspan="5"| {{MapCoords|27948-4523|Geheimnissvolle Waldlichtung|380}} | ||
|- | |- | ||
| {{QuestEmp|dickson_forest|Dickson Forest}} || {{QuestEmp|glade|Waldwiese}} || {{QuestEmp|gypsy|Die alte Frau}} || {{QuestEmp|gypsy|Die brauende Vagabundin}} | | colspan="2"| {{QuestEmp|dickson_forest|Dickson Forest}} || colspan="2"| {{QuestEmp|glade|Waldwiese}} || colspan="2"| {{QuestEmp|gypsy|Die alte Frau}} || colspan="2"| {{QuestEmp|gypsy|Die brauende Vagabundin}} || colspan="2"| {{QuestEmp|forester|Förster}} | ||
|} | |} | ||
{| id=28709-5167 | {| id=28709-5167 | ||
! colspan=" | ! colspan="6"| | ||
== Kleine Ranch == | |||
|- | |- | ||
| colspan=" | | colspan="3"| [[File:quests_ranch_02.png|link=]] || colspan="3"| {{MapCoords|28709-5167|Kleine Ranch|380}} | ||
|- | |- | ||
| {{QuestEmp|thomas1|Thomas Herson}} || {{QuestEmp|uncle_scott|Die Farm von Scott Williams}} || {{QuestEmp|christopher|Christopher}} || {{QuestEmp|house|Henrys Zuhause}} || {{QuestEmp|jesse_james|Frank J. Dalton}} || {{QuestEmp|doctor_jane|Doktor Jane}} | |||
|} | |} | ||
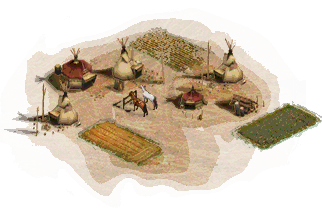
{| id=28002-16658 | {| id=28002-16658 | ||
! colspan=" | ! colspan="6"| | ||
== Indianer-Reservat == | |||
|- | |- | ||
| colspan=" | | colspan="3"| [[File:quests_indianerlager_02.png|link=]] || colspan="3"| {{MapCoords|28002-16658|Indianerreservat|380}} | ||
|- | |- | ||
| {{QuestEmp|wapameepto|Häuptling Mistawasis}} || {{QuestEmp|indianvillage|Waupees Indianerdorf}} || {{QuestEmp|native_camp|Indianerdorf}} || {{QuestEmp|indian_camp|Indianercamp}} || {{QuestEmp|siox_village|Ein Sioux-Dorf}} || {{QuestEmp|indian_dancer|Ein Tänzer}} | |||
|} | |} | ||
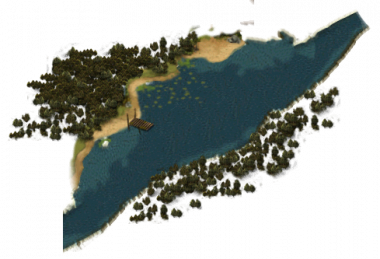
{| id=31061-16408 | {| id=31061-16408 | ||
! colspan=" | ! colspan="6"| | ||
== Flussufer == | |||
|- | |- | ||
| colspan=" | | colspan="3"| [[File:quests_fluss_01.png|380px|link=]] || colspan="3"| {{MapCoords|31061-16408|Flussufer|380}} | ||
|- | |- | ||
| {{QuestEmp|thomas1|Thomas Herson}} || {{QuestEmp|grave_parents|Grab deiner Eltern}} || {{QuestEmp|river|Das Flußbett}} || {{QuestEmp|river2|Der Fluss}} || {{QuestEmp|doolin|Der verletzte Bill Doolin}} || {{QuestEmp|pirate|Pirat}} | |||
|} | |} | ||
{| id=33063-3821 | {| id=33063-3821 | ||
! colspan=" | ! colspan="6"| | ||
== Klapperschlangen-Canyon == | |||
|- | |- | ||
| colspan=" | | colspan="3"| [[File:quests_canyon.png|380px|link=]] || colspan="3"| {{MapCoords|33063-3821|Klapperschlangen-Canyon|380}} | ||
|- | |- | ||
| {{QuestEmp|mainstory_canyon|Klapperschlangen-Canyon}} || {{QuestEmp|mainstory_canyon_sam|Sam McKenzy}} || {{QuestEmp|mainstory_canyon_safe|Das verborgene Edelsteinlager}} || {{QuestEmp|mainstory_canyon_henry|Der wiedergekehrte Dutch Henry}} || {{QuestEmp|canyon|Der Bryant-Spalt}} || {{QuestEmp|old_trapper|Alter Fänger}} | |||
|} | |} | ||
{| id=36152-3576 | {| id=36152-3576 | ||
! colspan=" | ! colspan="6"| | ||
== Amahpiya-Berg == | |||
|- | |- | ||
| colspan=" | | colspan="3"| [[File:quests_berg_01.png|link=]] || colspan="3"| {{MapCoords|36152-3576|Amahpiya-Berg|380}} | ||
|- | |- | ||
| {{QuestEmp|mountain|Berg}} || {{QuestEmp|cliff|Die Klippe}} || {{QuestEmp|holyrock|Heiliger Fels}} || {{QuestEmp|vogon|Häuptling der Wogonen}} || {{QuestEmp|brown|Barnum Brown}} || {{QuestEmp|oach_olive|Oach-Olive}} | |||
|} | |} | ||
{| id=35032-6703 | {| id=35032-6703 | ||
! colspan="6"| | ! colspan="6"| | ||
== Burnham City == | |||
|- | |- | ||
| colspan="3"| [[File:quests_stadt_01.png|link=]] || colspan="3"| {{MapCoords|35032-6703| | | colspan="3"| [[File:quests_stadt_01.png|link=]] || colspan="3"| {{MapCoords|35032-6703|Burnham City|380}} | ||
|- | |- | ||
| {{QuestEmp|thomas1|Thomas Herson}} || {{QuestEmp|breagon| | | {{QuestEmp|thomas1|Thomas Herson}} || {{QuestEmp|breagon|Burnham City}} || {{QuestEmp|dancer|Die Tänzerin}} || {{QuestEmp|andreson|Dean Andreson}} || {{QuestEmp|siringo|Charlie Siringo}} || {{QuestEmp|dead_hand_deputy|Ansässiger Deputy}} | ||
|} | |} | ||
{| id=36006-10586 | {| id=36006-10586 | ||
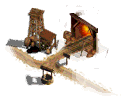
! colspan="6"| Silbermine | ! colspan="6"| | ||
== Silbermine == | |||
|- | |- | ||
| colspan="3"| [[File:quests_mine_02.png|link=]] || colspan="3"| {{MapCoords|36006-10586|Silbermine|380}} | | colspan="3"| [[File:quests_mine_02.png|link=]] || colspan="3"| {{MapCoords|36006-10586|Silbermine|380}} | ||
| Zeile 212: | Zeile 252: | ||
|} | |} | ||
{| id=34698-18686 | {| id=34698-18686 | ||
! colspan="6"| Große Ranch | ! colspan="6"| | ||
== Große Ranch == | |||
|- | |- | ||
| colspan="3"| [[File:quests_ranch_01.png|link=]] || colspan="3"| {{MapCoords|34698-18686|Große Ranch|380}} | | colspan="3"| [[File:quests_ranch_01.png|link=]] || colspan="3"| {{MapCoords|34698-18686|Große Ranch|380}} | ||
| Zeile 219: | Zeile 260: | ||
|} | |} | ||
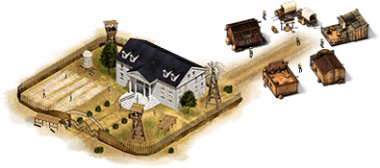
{| id=40487-5866 | {| id=40487-5866 | ||
! colspan=" | ! colspan="6"| | ||
== Altes Herrenhaus == | |||
|- | |- | ||
| colspan=" | | colspan="3"| [[File:quests_herrenhaus_01.png|380px|link=]] || colspan="3"| {{MapCoords|40487-5866|Altes Herrenhaus|380}} | ||
|- | |- | ||
| {{QuestEmp|thomas1|Thomas Herson}} || {{QuestEmp|mr_brown|Mr. Brown}} || {{QuestEmp|housewife|Das Hausmädchen}} || {{QuestEmp|nix|E.D. Nix}} || {{QuestEmp|scarlett|Scarletts Haus}} || {{QuestEmp|zoologist|Peter}} | |||
|} | |} | ||
{| id=43601-3465 | {| id=43601-3465 | ||
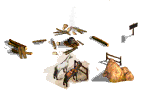
! colspan="14"| Einsame Wüstenruinen | ! colspan="14"| | ||
== Einsame Wüstenruinen == | |||
|- | |- | ||
| colspan="7"| [[File:quests_wuestenlager02.png|link=]] || colspan="7"| {{MapCoords|43601-3465|Einsame Wüstenruinen|380}} | | colspan="7"| [[File:quests_wuestenlager02.png|link=]] || colspan="7"| {{MapCoords|43601-3465|Einsame Wüstenruinen|380}} | ||
| Zeile 233: | Zeile 276: | ||
|} | |} | ||
{| id=44459-7687 | {| id=44459-7687 | ||
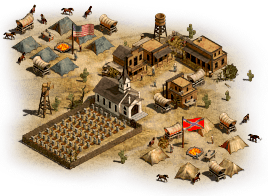
! colspan="10"| Missionsstadt | ! colspan="10"| | ||
== Missionsstadt == | |||
|- | |- | ||
| colspan="5"| [[File:quests_pilgrim.png|link=]] || colspan="5"| {{MapCoords|44459-7687|Missionsstadt|380}} | | colspan="5"| [[File:quests_pilgrim.png|link=]] || colspan="5"| {{MapCoords|44459-7687|Missionsstadt|380}} | ||
| Zeile 240: | Zeile 284: | ||
|} | |} | ||
{| id=43661-15331 | {| id=43661-15331 | ||
! colspan="6"| Außenposten | ! colspan="6"| | ||
== Außenposten == | |||
|- | |- | ||
| colspan="3"| [[File:quests_fort.png|link=]] || colspan="3"| {{MapCoords|43661-15331|Außenposten|380}} | | colspan="3"| [[File:quests_fort.png|link=]] || colspan="3"| {{MapCoords|43661-15331|Außenposten|380}} | ||
| Zeile 247: | Zeile 292: | ||
|} | |} | ||
{| id=44926-17992 | {| id=44926-17992 | ||
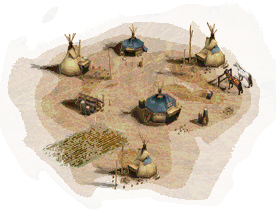
! colspan="6"| Indianerstamm | ! colspan="6"| | ||
== Indianerstamm == | |||
|- | |- | ||
| colspan="3"| [[File:quests_indianerlager_01.png|link=]] || colspan="3"| {{MapCoords|44926-17992|Indianerstamm|380}} | | colspan="3"| [[File:quests_indianerlager_01.png|link=]] || colspan="3"| {{MapCoords|44926-17992|Indianerstamm|380}} | ||
| Zeile 254: | Zeile 300: | ||
|} | |} | ||
{| id=46079-13547 | {| id=46079-13547 | ||
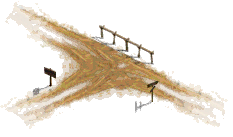
! colspan="6"| Östlicher Knotenpunkt | ! colspan="6"| | ||
== Östlicher Knotenpunkt == | |||
|- | |- | ||
| colspan="3"| [[File:quests_westliches_wegkreuz.png|link=]] || colspan="3"| {{MapCoords|46079-13547|Östlicher Knotenpunkt|380}} | | colspan="3"| [[File:quests_westliches_wegkreuz.png|link=]] || colspan="3"| {{MapCoords|46079-13547|Östlicher Knotenpunkt|380}} | ||
Aktuelle Version vom 30. August 2023, 11:09 Uhr
Questgeber auf der Karte
Neben den bekannten Questgebern im Saloon gibt es auch Plätze auf der Karte, an denen Quests auf dich warten. Ein solcher Questgeber muss keine Person sein, sondern kann auch ein Ort sein, an dem du etwas machen musst. Questgeber auf der Minimap werden durch ein schwarzes Ausrufezeichen mit gelbem Hintergrund gekennzeichnet. Um nicht zu viele Anlaufpunkte auf der Karte suchen zu müssen, wurden die Questgeber auf einige, wenige Questpunkte zusammengelegt.
Um eine Aufgabe von einem Questgeber anzunehmen, musst du dich bei ihm befinden. Es gibt Aufgaben, die erst sichtbar werden, wenn du dich am Standort des Questgebers befindest.
Hier folgt nun eine Liste aller bekannten Questorte und den dort sich befindenden Questgebern. Bedenke aber, dass so mancher Questgeber erst auftaucht wenn bestimmte Voraussetzungen erfüllt sind.
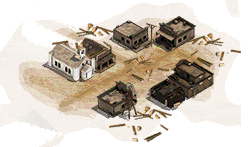
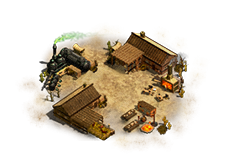
Geisterstadt | |||||
|---|---|---|---|---|---|
 |
 | ||||
Altes Fort |
Geisterstadt |
Aretha die Kaltblütige |
Dean Andreson |
Kopfgeldjäger |
Zeuge am alten Fort |
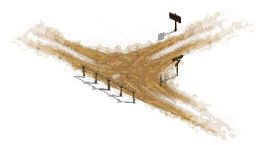
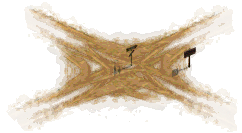
Westlicher Knotenpunkt | |||||
|---|---|---|---|---|---|
 |
| ||||
Westlicher Punkt |
Potomac County |
Der Vorarbeiter | |||
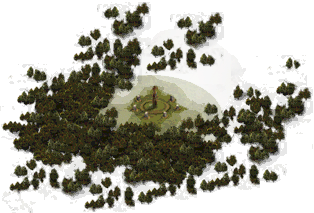
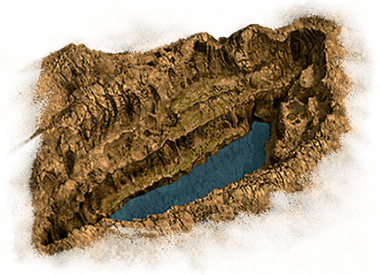
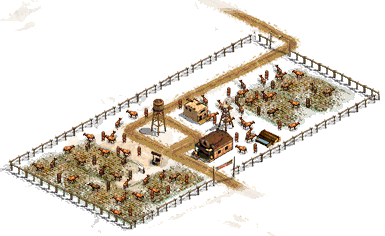
Streinkreislichtung | |||||
|---|---|---|---|---|---|
 |
| ||||
Der Mexikaner |
Die alte Frau |
William der Fröhliche |
Dean Anderson |
Holzfäller Harper |
Ausgebrannte Hütte |
Herrensitz | |||||||||
|---|---|---|---|---|---|---|---|---|---|
 |
| ||||||||
House of the Rising Sun |
Das Anwesen |
Belle Starr |
Herrensitz |
Läuft wie ein Reh | |||||
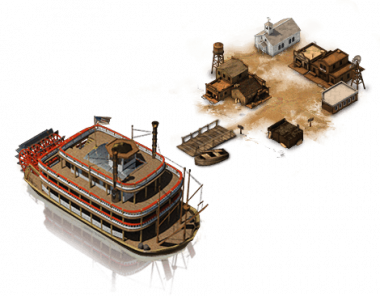
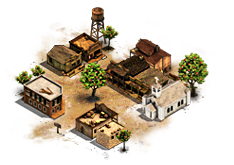
Newport | |||||
|---|---|---|---|---|---|
 |
| ||||
Newport |
Major |
Bank von Newport |
Wüstenlager der Diebe |
Majors Residenz |
Wasserleitungen |
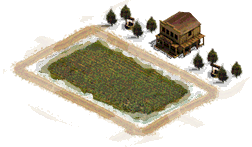
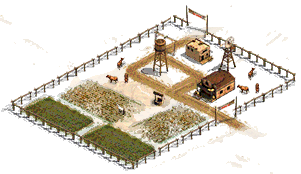
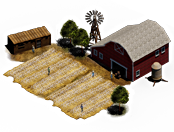
Einsame Farm | |||||
|---|---|---|---|---|---|
 |
| ||||
Maisfeld |
Chivingtons Farm |
Steve Chuck |
Wilsons Farm |
Dean Anderson |
Angus McGuffin |
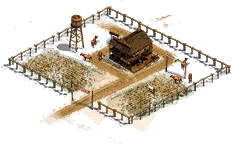
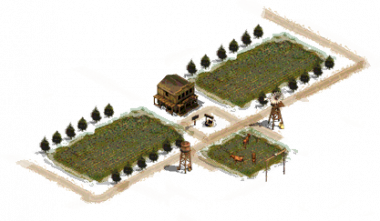
Farm der Cunninghams | |||
|---|---|---|---|
 |
| ||
Johnny Westwood |
Flint Westwood |
Die Farm der Cunninghams |
Die verbrannte Farm der Cunninghams |
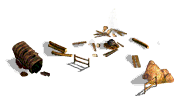
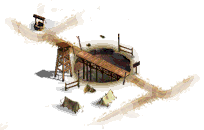
Lagerplatz | |||
|---|---|---|---|
 |
| ||
Der alte Jacob |
Der Chinese |
Ted der Listige |
Banditenlager |
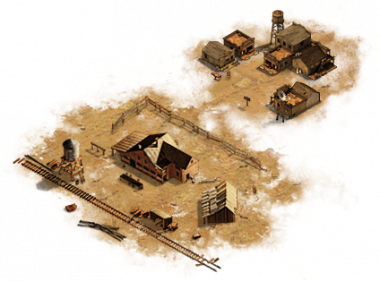
Saltwater | |||||
|---|---|---|---|---|---|
 |
| ||||
Saltwater Station |
Saltwater Ranch |
Mortimer Eisenbahn-Gesellschaft |
Calvin |
Lehrerin |
Bäcker |
Crystal Town | |||||
|---|---|---|---|---|---|
 |
| ||||
Bella |
Crystal Town |
In der Umgebung von Crystal Town |
Pokerturnier |
Von Angesicht zu Angesicht mit Calvin |
Die hilflose Bella |
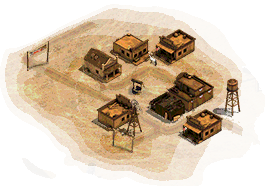
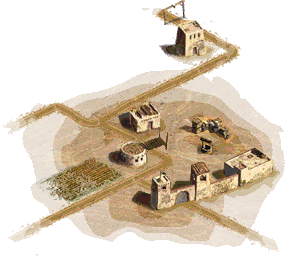
Wüstenstadt | |||||||||
|---|---|---|---|---|---|---|---|---|---|
 |
| ||||||||
Yang |
Jake Lonergan |
Eisenbahnbau |
Grab der Postkutschen-Mary |
Geheimer Club | |||||
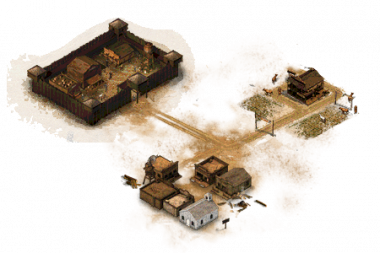
Fort Mencer | |||||
|---|---|---|---|---|---|
 |
| ||||
Fort Mencer |
Bonnies Farm |
Nigel, der Waffenhändler |
Der junge Marshall |
Seth, der Schatzsucher |
Die rechte Hand des Teufels |
Dunkle Höhle | |||||||||
|---|---|---|---|---|---|---|---|---|---|
 |
| ||||||||
Schacht |
Die Höhle |
Dean Andersson |
Mr. Crittle |
James Marshall | |||||
Werkstatt | |||
|---|---|---|---|
 |
| ||
Meisterfeldkoch |
Meisterquacksalber |
Meisterschmied |
Meistersattlerin |
Big Bourbon | |||||||||
|---|---|---|---|---|---|---|---|---|---|
 |
| ||||||||
Applepie-Annie |
Mister B. |
Irish Bob |
Big Bill |
Big Bourbon | |||||
Jacksonville | |||
|---|---|---|---|
 |
| ||
Cindy´s Diner |
Der wandernde Zirkus |
Mrs. Anderson |
Jacksonville |
Zentraler Knotenpunkt | |||
|---|---|---|---|
 |
| ||
Kreuzung |
Ein Siedlerverband |
Dean Antonson |
Expressreiter Pete |
Alte Eisenmine | |||||
|---|---|---|---|---|---|
 |
| ||||
Mine |
Alte Mine |
Ruinen im Gebirge |
Old Man Hackett |
Emilio Vargas |
Lorenzo |
Sad Hill | |||||
|---|---|---|---|---|---|
 |
| ||||
Die Stadt Sad Hill |
Galgen von Sad Hill |
Kaputte Postkutsche am Rande von Sad Hill |
Südliches Armeelager |
Armeelager der Nordstaaten |
Friedhof von Sad Hill |
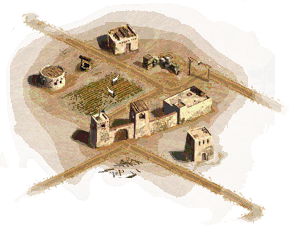
Neue Siedlung | |||||
|---|---|---|---|---|---|
 |
| ||||
Die Siedlung Hope |
Das Greenhorn-Lager im Wald |
Neu besiedeltes Reservat |
Bahnstation der Siedlung Colby |
Alan Pinkerton |
Dieb |
Wüstenlager | |||||
|---|---|---|---|---|---|
 |
| ||||
Mugridge |
Old Man Hackett |
Emilio Vargas |
Pablo Salvador |
Geheimnisvoller Fremder |
Heisenzwerg |
Shadyland | |||
|---|---|---|---|
 |
| ||
Sheriff von Shadyland |
Calvins Residenz |
Tiefe, dunkle Mine |
Versklavte Menschen |
Geheimnissvolle Waldlichtung | |||||||||
|---|---|---|---|---|---|---|---|---|---|
 |
| ||||||||
Dickson Forest |
Waldwiese |
Die alte Frau |
Die brauende Vagabundin |
Förster | |||||
Kleine Ranch | |||||
|---|---|---|---|---|---|
 |
| ||||
Thomas Herson |
Die Farm von Scott Williams |
Christopher |
Henrys Zuhause |
Frank J. Dalton |
Doktor Jane |
Indianer-Reservat | |||||
|---|---|---|---|---|---|
 |
| ||||
Häuptling Mistawasis |
Waupees Indianerdorf |
Indianerdorf |
Indianercamp |
Ein Sioux-Dorf |
Ein Tänzer |
Flussufer | |||||
|---|---|---|---|---|---|
 |
| ||||
Thomas Herson |
Grab deiner Eltern |
Das Flußbett |
Der Fluss |
Der verletzte Bill Doolin |
Pirat |
Klapperschlangen-Canyon | |||||
|---|---|---|---|---|---|
 |
| ||||
Klapperschlangen-Canyon |
Sam McKenzy |
Das verborgene Edelsteinlager |
Der wiedergekehrte Dutch Henry |
Der Bryant-Spalt |
Alter Fänger |
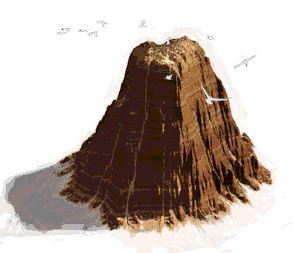
Amahpiya-Berg | |||||
|---|---|---|---|---|---|
 |
| ||||
Berg |
Die Klippe |
Heiliger Fels |
Häuptling der Wogonen |
Barnum Brown |
Oach-Olive |
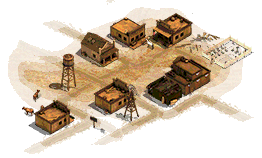
Burnham City | |||||
|---|---|---|---|---|---|
 |
| ||||
Thomas Herson |
Burnham City |
Die Tänzerin |
Dean Andreson |
Charlie Siringo |
Ansässiger Deputy |
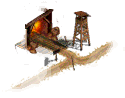
Silbermine | |||||
|---|---|---|---|---|---|
 |
| ||||
Mine |
Old Man Hackett |
Bannisters Mine |
George Curry |
Mr. Crittle |
Silbermine |
Große Ranch | |||||
|---|---|---|---|---|---|
 |
| ||||
Der Pferdezüchter |
Der Mörder |
Ranch |
Die Ranch von Henrys Bruder |
Scarletts Sommeraufenthalt |
Feiertags-Geist |
Altes Herrenhaus | |||||
|---|---|---|---|---|---|
 |
| ||||
Thomas Herson |
Mr. Brown |
Das Hausmädchen |
E.D. Nix |
Scarletts Haus |
Peter |
Einsame Wüstenruinen | |||||||||||||
|---|---|---|---|---|---|---|---|---|---|---|---|---|---|
 |
| ||||||||||||
Kojotenwüste von Capura |
Der Revolverheld |
Pablo Salvador |
Emilio Vargas |
Das Versteck von Cheyenne |
Bob Ford |
Edward D. Cope | |||||||
Missionsstadt | |||||||||
|---|---|---|---|---|---|---|---|---|---|
 |
| ||||||||
Hochsicherheitsgefängnis |
Die linke Hand des Teufels |
Mission |
Stall |
Übungsplatz | |||||
Außenposten | |||||
|---|---|---|---|---|---|
 |
| ||||
Alter Außenposten |
Kojote |
Indianer der Muscogee |
Henry Borne |
Mine |
Ausgebrannter Außenposten |
Indianerstamm | |||||
|---|---|---|---|---|---|
 |
| ||||
Waupees Großvater |
Lager der Irkatchen |
Gui-Kate |
Kleiner Adler |
Tecumseh |
Chatan |
Östlicher Knotenpunkt | |||||
|---|---|---|---|---|---|
 |
| ||||
Östlicher Punkt |
Andy |
Mr. Crittle | |||